Any leakage in the plumbing device or in-house communications is a problem associated with financial losses, so it must be resolved immediately. If the toilet flows after flushing, or the sound of a babbling brook periodically comes from the toilet, it's time to check the condition of the tank. Do you agree?
We will talk about the most common breakdowns that happen with plumbing equipment, which is mandatory for furnished housing. Here you will learn how to deal with them on your own. Based on our advice, you can eliminate such situations and competently repair an important device for life.
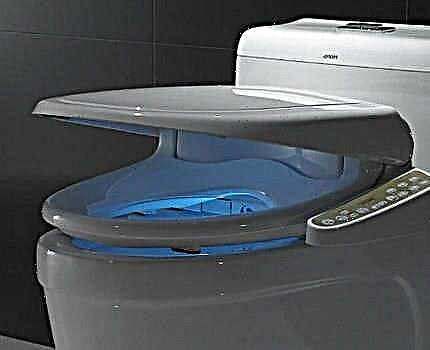
The first signs of water leakage
The flush function involves the long or short-term flow of water into the toilet bowl in order to cleanse it of waste products. The process begins with pressing the button built into the tank, and ends arbitrarily or by a second press.
Instead of a button, there may be a lever or handle on a chain, as in retro models, but such options are extremely rare.
By pressing the button we control the drain valve. It is associated with a locking mechanism, which at the end of the drain opens the way for a new portion of water from the cold water system. Thus, flushing occurs only at the request of the user.
If water flows into the toilet after flushing or, even worse, constantly flows in a thin stream, it's time to check the tank fittings - one of the parts is out of order.

There are two ways to solve the problem: on your own, trying to figure out the structure of the trigger, or with the help of qualified plumbers
But first, you must determine that the leak is really present.
The following factors are indications of a malfunctioning drain:
- a constant or periodically appearing characteristic sound of bubbling water;
- rusty and limestone stains at the water outlet;
- constantly wet inner wall of the toilet close to the tank, even if the toilet has not been used for a long time;
- unusually long and weak flushing process - volley discharge is considered the norm;
- the appearance on the pipes and tank of condensate, which has never been.
The last symptom is associated with the constant movement of cold water through the pipe, while under normal conditions the water is used periodically and has time to warm up to room temperature until the time of descent.

If you notice a rusty track or yellowish, hard-to-wash spots in the area of water drainage, you should not stop at one cleaning - you should definitely inspect the tank
Sometimes the cause of smudges lies in the dirt that has accumulated at the bottom of the water tank. In this case, it is enough to apply thorough cleaning of the inner surfaces of the tank. To do this, drain and block the water, gently pull out the fittings and with the help of a brush and cleaning products remove the sediment accumulated on the bottom and walls.
If operational cleaning does not help, you will have to get acquainted with the design of the drain mechanism.
We disassemble the tank device
There are several common reinforcement designs that can be called typical. Among them, an outdated type of drain device with a rubber bulb, assembled according to the simplest scheme and suitable for tanks with side piping.
This is a rare phenomenon uncharacteristic of modern models. We turn to the current type of fittings, consisting of two modules: drain and float.
The float on a thick metal wire was improved and turned into a more complex design, blocking the water supply not from the side, as before, but from below, although side models are rarely found. The position of the float from them is regulated, so that a portion of the discharged water can be dosed.

The scheme of the device reinforcement. Drain is triggered by the movement of a button that is connected to the trigger. When water leaves the tank, the inlet valve opens - until the desired volume is collected
Due to the similarity of the valve models, it is easy to replace the entire structure or change individual parts: whether the float mechanism is a drain, the drain lever.
To understand how each element is arranged individually, you can disassemble the model installed in the tank. Of course, before this you need to observe safety measures: block the flow of water on the riser or eyeliner and empty the tank.
All parts are unscrewed manually or using a set of keys. There are almost no metal parts, instead of them only plastic elements have been used for a long time. They are quite durable, do not deform when interacting with hard water, do not rust, they are well cleaned with household chemicals.

In addition to the fixed parts, which are fastened with bolts and rubber or plastic seals, there are parts that can be adjusted - the so-called sliders. They can be recognized by small divisions and notches.
The sizes and colors of parts from different manufacturers may vary, but the principle of operation is exactly the same. Therefore, if the seal has worn out and a trickle of water is constantly leaking from the tank into the toilet bowl, it is not difficult to find a replacement.
For fidelity, you can measure the diameter of the ring or simply show the seller an old gasket.
Common problems and solutions
There are several reasons for the leak. Drain problems can be caused by a breakdown of the float, failure of the drain column, clogged in the fittings with dirt, wear of rubber seals. Let us dwell on the common cases of smudges and choose the best ways to solve problems.
Water is constantly flowing
One of the obvious signs indicating the need for urgent repair is a thin stream of water. If no filters are installed at the outlet of the highway from the riser, over time the “channel” of the brook is covered with sediment from rust and mineral deposits. If water constantly flows in the toilet - what should be done in such a situation?
Initially, the cause of the leak should be identified. It is clear that this is not a toilet bowl or installation errors - the roots of trouble must be sought inside the tank. To begin with, look under the cover and try to identify the damage visually. If this does not work out, we dismantle the toilet valves in the following order.
Image Gallery
Photo from
Step 2 - unscrew the drain button
Step 3 - remove the cap from the tank
Step 4 - take out the parts one by one
If the drain mechanism cannot be removed without removing the tank, first remove the tank. To do this, unscrew the two mounting screws located on the bottom of the toilet shelf.
The above instructions are universal and suitable for the repair of drain valves. And now let's move on to specific breakdowns.
The first reason - the float mechanism failed
Fortunately, this trouble can be determined without removing the tank: you just need to look under the lid. If the float ceases to fulfill its function, then it does not rise to the desired level, but is constantly in one place.
It does not respond to the increased volume of water in the tank, as a result, the overflow system is activated and the water flows idle into the toilet. Most likely, the float has lost its tightness and is drowning.
The second option - the mounts broke. In any case, the broken model must be replaced with a new element. To do this, we remove the old float and take it with us, so that in a specialized market we can present it to the consultant as a sample.
Image Gallery
Photo from
Lightly pressing the retaining button on the ring, remove it, and then unscrew the button itself
Carefully remove the lid, put it aside, because it will not come in handy for a long time
To determine the cause of leakage, return the button to its place and flush
The float fires, but gradually the water continues to rise and covers it - which means a malfunction in it
We shut off the water, unscrew the mounting studs and eyeliner, then remove the tank from the toilet shelf
We turn off the broken part, in its place we install a new one and fix it with plastic fasteners
We connect a flexible eyeliner and install the tank in place, tightening the studs tightly
We install the lid, then the drain button and make a test drain
Step 1 - unscrew the drain button
Step 2 - remove the tank cap
Step 3 - make diagnostics
Step 5 - dismantle the tank
Step 6 - Install a New Float
Step 7 - fix the tank on the shelf
Step 8 - check the operation of the new valve
If after the next filling of the tank the flow stopped, the problem is solved. But as an insurance, it’s worth watching the mechanism for a few more days.
The second reason - the rubber seal has become unusable
A sealing ring made of polymer or rubber is the weakest point of the drain mechanism. It is located directly at the outlet of the water stream, therefore, at the same time it serves as a barrier that delays a variety of dirt, sediment, and mineral deposits from pipes. As a result, the gum is either dirty or frayed and frayed.
In the first case, it must be cleaned, and in the second, replacement is required. The remaining parts of the drain column are reliable, in other words, this part has nothing to break. Cleaning the valve is as follows.
Image Gallery
Photo from
Step 1 - dismantling the drain mechanism
Step 2 - Preparing the Cleaning Solution
Step 3 - Cleaning the Drain Valve Elements
Step 4 - refitting the speaker
If during cleaning you notice that the o-ring is damaged, it is better to install a new part. Signs of damage - deformation, cracks, microcracks, general deterioration. Even if it still retains its functionality, after a while it will again pass water.
Leak occurs after flushing
Sometimes you can observe this picture: a flush occurred, and after it for some time, water flows intermittently or even with a confident trickle into the toilet. Then the flow stops, but already after the tank is full.
Water losses are small, but even with a temporary leak, the money flies away, and the toilet bowl is slowly covered with plaque.
There may be several reasons:
- defective valve parts;
- skew of the drain column;
- partial clogging in the zone of water discharge;
- breakage of a small element of one of the valves.
To find out what’s the matter, you need to make a visual diagnosis, and if necessary, dismantle the drain mechanism or float valve.

It is quite difficult to notice a small marriage when buying, since the design of the drain mechanisms has a slightly different structure. But, after some time, he makes himself felt and has to change the fittings
The skew of the drainage mechanism can be noticed immediately - the button for releasing the water starts to jam or even fall down. You need to remove the cover and see why the column has lost stability. Perhaps she moved slightly out of the nest and changed her position. Correct the situation easily by returning the valve to its place.
It also happens that a rather large mineral particle penetrates under the o-ring, falling into the tank with a stream of water from the pipe. As long as there is little water in the tank, the pressure on the valve is weak, and fluid continues to flow into the toilet.
As soon as the tank is full, the pressure on the seal increases. It clamps a piece of mineral sediment and blocks the flow. Cleaning the tank will correct the situation.
Home craftsmen like to improve factory parts, and even in such a simple design as a drain valve, they manage to find flaws. Here is a simple example of how you can get rid of a minor but regular water leak immediately after flushing.

In order for the rubber ring to close the drain hole tightly, without waiting for the tank to fill, an additional load must be secured to the column axis, for example, lead solder
Even if the tank is empty, the load will press on the seal, thereby creating one hundred percent tightness. In this case, even slight wear of the rubber will not spoil the functionality of the valve.
Leakage Prevention
To prevent leakage in the toilet at the most inopportune moment, it is worth monitoring the condition of the tank fittings and regularly taking preventive measures.
The main and at the same time the simplest is the cleaning of all parts, as well as the internal surfaces of the tank. With a careful examination, you can notice that even for a short period of time, the walls and bottom are covered with a red coating, mineral deposits and even a substance similar to silt. The composition of the contaminants depends on the quality of the water.

To minimize the influx of various contaminants into the tank, internal wiring must be equipped with filters. They are installed on a cold water supply next to the riser.
From time to time, it is advisable to check the condition of the sealing elements, fasteners and parts that are at the joints in order to allow for the appearance of a strong leak. A small amount of moisture indicates that the connection is leaking. Accordingly, it is necessary to tighten the nuts or replace the seal.
Timely minor repairs and regular cleaning will save you from the leakage of water into the toilet, therefore, from unnecessary costs. An important factor that saves water, clogging and breakage is a well-made setting of fittings, we recommend that you familiarize yourself with the features of the fittings.
The best plumbing device repair advisers are experienced homeworkers. The results of their work can be found in the following videos.
Video # 1. Instructions for replacing fittings:
Video # 2. How to avoid buying a new set of fittings:
Video # 3. Replacing the old float with a new model:
All work related to cleaning or replacing drain valves can be done independently. If you cannot find a breakdown, but you need to urgently fix a leak, you can simply install a new valve - its cost is low.
It is advisable to contact plumbers in one case: if you tried to correct the situation on your own, but failed for some reason.
Do you want to talk about how you independently eliminated a leak in the toilet? Is there any useful information that you want to communicate to site visitors and us? Please write comments in the block below.