Modern wall-mounted sinks are one of the main elements of combined bathrooms and bathrooms. They differ from the models built into the countertop in the way of fastening.
We will tell you how to fix the sink in the bathroom to the wall in order to maintain the integrity of the bowl. We will also show you how to ensure the reliability of fixation and comfort during the operation of plumbing. Based on our recommendations, you can easily do all the work yourself.
Varieties of Wall Sinks
Back in the middle of the last century, almost all modifications of wall-mounted models were reduced to one type - a bowl mounted on two cast-iron brackets. Metal supports remained visible and did not look very aesthetically pleasing.
With the development of the plumbing industry, many new models have appeared that have a hidden method of fastening, are distinguished by an elegant design and durability. There are several classifications of wall-mounted washbasins, depending on the fasteners used, the shape or material of the bowl.
The so-called “tulips” or pedestal sinks also belong to wall models, but have additional supports that simultaneously mask the siphon and pipes. Furniture sets with a sink in the countertop are popular, and both the bowl itself and the hanging cabinet can be attached to the wall.

Models with cabinets and cabinets are practical. Detergents, household chemicals or hygiene items can be stored in drawers or shelves
Convenient to use bowls built into the countertop. The countertop, in turn, is also fixed to the wall, and not mounted on the floor.
Thus, the area under the sink remains completely free, which is convenient for cleaning and just for washing. However, more practical residents install under a sink-countertop or a small-sized washing machine, or a small shelf for sanitary accessories.
Image Gallery
Photo from
Faience and porcelain - a universal option for the bathroom
Special Maintenance Glass Models
Dear washbasins made of natural stone
Artificial Stone and Composite Materials
The most popular are ceramic models. But when choosing, you should remember that earthenware models are simpler and cheaper, while porcelain models look more attractive, but are notable for their high price.
For bathrooms with a deficit of free space, compact corner models are sold without unnecessary surroundings. Unlike the front ones, they do not require a free wall and easily fit in a niche or corner with a wall width of 0.3 m.
Step-by-step instructions for fastening
The mounting method depends on the washbasin model. For example, the installation of a single porcelain sink differs from the installation of a plumbing fixture built into a hanging countertop, although both options are attached to the wall.
Today, the most common is the method of mounting on brackets, which are studs or screws screwed into the wall. Below is a detailed guide for fixing a ceramic sink to a wall in the bathroom.
Stage # 1 - preparatory work
Preparation involves the purchase of a plumbing fixture, mixer, drain kit, as well as checking the reliability of the wall.
First you need to make sure that the wall will stand your chosen sink. In modern apartments, redevelopments are often carried out or false walls are being erected, as a result of which instead of a supporting wall, gypsum cardboard may appear under ceramic tiles.
If the base is weak, you will have to partially disassemble the wall and install mortgages - for example, metal guides, installation for hanging plumbing or wooden blocks.

Sometimes waterproof gypsum board is used as a material for the construction of additional supports or camouflage boxes. This is useful when wall mounts do not fully fulfill their function.
In order not to be distracted during the installation process, you need to prepare a set of tools. You will need a drill or puncher for punching holes, an adjustable wrench or a set of open-end wrenches in size, level, construction tape measure or a long metal ruler, marker. Plumbing sealant is also necessary, in some cases - special glue.
Stage # 2 - marking on the wall
Proper markup is half the battle. If the holes are not accurately drilled, lining replacement may be required. It is not difficult to buy a plastic panel, however, ceramic collection tiles will cost much more, there is a risk of not finding it on sale.
Therefore, you need to accurately determine the installation height (85-90 cm) and measure the distance between the holes for mounting. The necessary numbers are indicated in the instructions that complete the new plumbing product.

The level helps to determine the horizontal and position the washbasin as evenly as possible. Aesthetics and the quality of connection of the drain mechanism and water hoses depend on the degree of accuracy
We take the dimensions from the bowl or find the desired values on the diagram, then transfer them to the wall. Places for holes are marked with a marker.
It’s sometimes easier to make a trial installation of a plumbing fixture: this is usually done with tulip shells and models with hanging cabinets or countertops. We make sure that the communication holes are in close proximity.
Stage # 3 - drilling holes
This stage is associated with the difficulty of drilling revetted walls. To perform a seemingly simple operation, experience is needed, otherwise the tile will simply crack. The fact is that for drilling tiles and foundations (concrete, brick), different drills and different operating modes are required. Masters also use one tool, but not everyone succeeds.
To prevent the drill from slipping and entering the tile evenly, it is necessary to use a core. Put it to the drilling point and gently hit it with a hammer several times.

Then we take a drill with a feather or lance-shaped drill and drill two holes in the marked places. After the actions performed, we check the distance with a tape measure, and with the level - the horizontal location
Next, the drill can be changed to a punch and continue to work - drilling holes in the wall. The diameter of the core drill is 12 mm. The minimum mounting bracket depth is 5 cm, but the exact data must be clarified in the instructions. We clean the finished holes using improvised materials or a vacuum cleaner.
Stage # 4 - fixing the fasteners to the wall
Sink holders are anchor bolts perpendicular to the wall. So that they fit tightly and do not stagger, plastic plugs or devices such as dowels are inserted into the holes.
Often fasteners are included with the new product, so you don’t need to pick anything up. Gently screw the metal rods into the holes so that the ends of the required length remain outside.

The lengths of the studs should be enough to fit both the plumbing fixture and the nuts that secure the sink and pull it to the wall
Sometimes there are problems with fixing anchors. The main reason is a crack or seam in the base under the tile. To get rid of the defect, you can try to concrete the gap, and then carefully drill a hole in it. But there is an easier way - to fill the cavity with epoxy glue, and then immediately insert a bolt into the hole so that it fixes better.
Stage # 5 - Installing the Sink Bowl
The final stage of fixing the sink to the wall is easy: the sink is simply strung on anchor bolts and pressed as tightly as possible to the wall. Then we take the nuts with gaskets and twist them on the remaining free ends of the pins.

To strengthen the fastening, sometimes additionally use glue. Before mounting the bowl, smear with a sealant or adhesive the junction of the plumbing fixture to the wall
When the nuts are tightened, the sink is pressed and glued. The positive point is a stronger mount, the negative is the difficulty with replacing equipment in the future. If you need to remove the sink for more convenient installation of the mixer or siphon, this will also be impossible.
Installing the model on the studs is not the final step. It is also necessary to connect a drainage system with a water lock and a mixer, if it is installed on the sink, and not on the wall.
The sequence of events can proceed in different ways: often, for ease of installation, all devices are installed first, and then the sink is already mounted. At the finish, it remains only to connect the hoses.
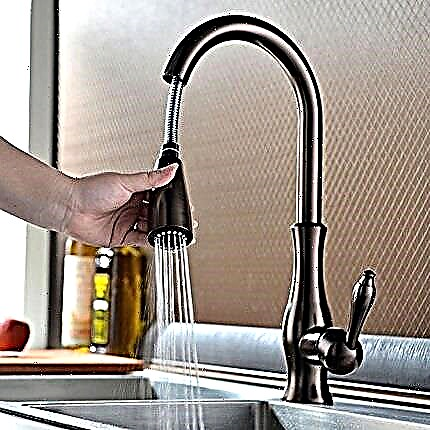
How to install the mixer?
The most successful option is to install the device before installing the sink. The bowl is placed in a convenient position and the mixer is mounted in a specially designed hole on the shelf of the bowl.
Image Gallery
Photo from
Step 1 - Replacing the Mixer
Step 2 - mounting the mounting bracket
Step 3 - Adjusting the Mixer Location
Step 4 - Finish Tightening the Fastening Nut
The installation process does not depend on the design of the mixer: lever and valve models are installed according to one sample. Connection to the water supply also happens the same way. Flexible hoses of the mixer are connected to the outlet openings of the hot water and cold water pipes, then the nuts are tightened. The joints are sealed if necessary.
An important nuance: before connecting the communications, it should be clarified which side is cold / hot water. If the mixer is installed correctly, then its supply for cold water is on the right, and for hot water on the left.
The final touch is testing. It is better to carry it out after connecting the drain device and with the aerator removed - so as not to spoil it with debris that accidentally gets into the network during repair.
Drain device connection
A drain device is a plastic or metal water trap with nozzles or a corrugated hose. Consider installing the popular bottle model, which is easy to install, and if clogging occurs, it is quickly and easily cleaned.
Image Gallery
Photo from
Step 1 - assembly of the drain device from the individual elements
Step 2 - Install Overflow Drain
Step 3 - installation of a hydraulic lock with a corrugation
Step 4 - connecting the drain device to the sewer
An important final point is to check the drainage system for leaks. At the same time, you can check the operation of the mixer. We plug the drain valve with a stopper, wait for the sink to fill, and watch how the water goes through the overflow.
Then we take out the cork and in the same way we check whether the siphon is leaking. If no leaks are observed, the installation process of the drain is considered complete.
Much of the installation process depends on the model of the sanitary fixture for the bathroom. To find out the details, we offer to get to know more different solutions.
Video # 1. How to install a wall-mounted tulip model:
Video # 2. Installation of a block of suspended structures - sinks, cabinets and cabinet:
Video # 3. Step-by-step installation instructions for the front model:
The installation of the sink in the bathroom belongs to the category of lungs, so they can be done independently. Simplifies the process and the fact that you do not need a special tool, just a traditional home set.
Once you attach the sink to the wall, installing a mixer and a water lock, you can independently repair or replace equipment in the future.
Please write comments, post photos, ask questions in the block below. Tell us how you bought and installed the sink in your own bathroom. It is possible that in your arsenal there are technological subtleties that will be useful to site visitors.