The mechanical design of the wind generator in its pure form is only part of a full-fledged wind power installation. In addition to the mechanical design, the fully operational system has a number of electronic components.
So, for example, a controller for a wind generator is necessarily necessary - a device functionally designed to stabilize the battery charge parameters during the operation of a wind turbine.
We will figure out what functions the device performs and give the assembly diagrams of the controller with our own hands. In addition, we outline the features of the work and the desirability of buying a Chinese electronic unit for a wind turbine.
Wind generators and battery charge controllers
If a mechanical windmill is completely possible to make on your own, is it possible to make a windmill controller with your own hands?
In order to have some idea about the controllers of wind generators and successfully reproduce such equipment with your own hands, basic information about these devices will not be superfluous.
Image Gallery
Photo from
Windmills - current-generating plants that provide the ability to receive energy in places remote from the infrastructure: mountain camps, non-electrified villages, temporary parking
Units differing in constructive solutions generate energy using the inexhaustible potential of atmospheric mass movement
Unfortunately, the suppliers of green energy do not yet produce enough energy to cover all the needs of the residents of the house. Because they are used as additional sources both in the complex and separately
To power a number of household appliances, a wind turbine can be connected directly to consumers. However, this decision is irrational, because wind power cannot be controlled. To stabilize the supply of current you need a controller
If a set of "green" systems is installed to cover energy costs at home, a common set of equipment is used, including a controller that serves both solar panels and a wind turbine
The operation of the controller in the complex of equipment consists in ballast regulation of the amount of charge. It limits the voltage when it is exceeded and switches the system to ABA in the event of a fall
The controller prevents boiling of batteries, protects equipment from overheating and premature failure
In order to control the operation of an autonomous power plant and monitor the condition of the equipment, it is recommended that a power meter be included in the circuit
Electricity generation in a tourist complex
Vertical blade wind generator
A complex of windmills and solar panels
Controller model for a standard windmill
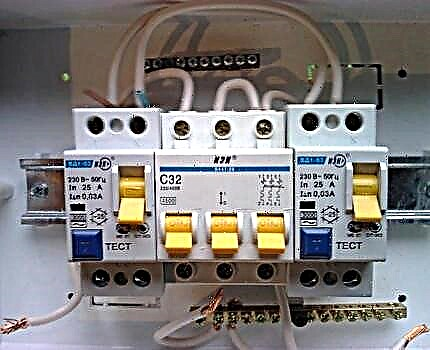
Autonomous Power Station Equipment
Devices for servicing green power plants
Batteries for energy storage
Power meter for monitoring the operation of a power plant
The controller that serves the batteries is designed primarily to control the process of charging the battery. This is its main function, but it should be conditionally divided into a number of subfunctions.
For example, one functional monitors the charge current and self-discharge current. Another functional implements actions aimed at measuring temperature and pressure. The third is responsible for compensating for the difference in energy flows when the battery is charged simultaneously with the current consumption by the load.

Battery charge controller for a small power wind generator. Monitoring of some system parameters is carried out through the built-in LCD
Industrial manufacturing devices are endowed with full functionality. But this can not be said for amateur designs. Devices made on the basis of the simplest circuit solutions at home with their own hands are controllers that are far from perfect models.
Nevertheless, they work and quite productively allow you to operate different types of wind generators. As a rule, in self-made structures, only one function is implemented - protection against overvoltage and from deep discharge.

One of the many do-it-yourself controller variations for windmills. Such designs are distinguished by simple technical solutions and the simplest execution of installation
Why is the introduction of a controller in a windmill system a must?
Because in the battery power-up mode without using a controller, unpleasant consequences should be expected:
- Battery structure degradation due to uncontrolled chemical processes.
- Uncontrolled pressure increase and electrolyte temperature.
- Loss of battery recharging properties in connection with a long-term discharge.
The charge controller for the scheme of the wind generator is, as a rule, in the form of a separate electronic module. This module is removable and quick disconnect. Industrial-made devices are necessarily equipped with an indication of the modes and conditions - light or visually transmitted through the display.
In practice, two types of devices can be used - built directly into the case of the wind generator and connected to the battery.
DIY assembly solutions
For all the time since the appearance of the first home-made windmills, the number of circuit solutions for controllers has grown many times. Many of the circuit designs are far from perfect, but there are also such options that you should pay attention to.
For domestic use, of course, relevant are simple schemes that require small financial investments, effective and reliable.
Based on these requirements, you can start with a controller for a wind generator created on the basis of automobile relay controllers. In the circuit, both relays with a negative control contact and relays with a positive control contact are applicable.
This option attracts with a small number of parts and simple installation. It will take only one relay, one power transistor (field), one resistor.

The circuit of the controller, drawn by a certain electronic engineer with his own hands. Everything here is simple and clear without a word. Actually, as in the technological decision itself. Minimum details - maximum savings (+)
The scheme is called "ballast", since it uses an additional load in the form of a conventional incandescent bulb. Thus, the list of parts will be replenished with another element - a lamp.
A car lamp (or several lamps) of 12 volts is used, depending on the power of the system. Also, instead of this element, it is permissible to use a load resistance of a different type: a powerful resistor, an electric heater, a fan, etc.
The work of the "ballast" circuit with a minus
The action of the automobile relay-regulator is directly related to the battery charge level. If the voltage at the battery terminals rises above 14.2 volts, the relay trips and opens the negative circuit of the power transistor.
In turn, a junction opens on the transistor, connecting a direct incandescent lamp to the battery. As a result, the charging current is discharged through the filament of the incandescent lamp. When the voltage at the battery terminals is reduced, the reverse process. This maintains a stable battery voltage level.
How does the "ballast" scheme with a plus
A slightly modernized version of the "ballast" charge controller for a wind turbine is the second circuit on the relay controller with a positive control contact. For example, relays from VAZ cars are suitable.
The difference from the previous circuit is the use of a solid-state relay, for example, GTH6048ZA2 at a current of 60A instead of a transistor. The advantages are obvious: the circuit looks even simpler and at the same time has greater reliability and efficiency.

Another simple circuit design for the assembly of a wind generator battery charge controller. The efficiency and reliability of the circuit is enhanced by the use of a solid-state relay (+)
A feature of this simple solution is a direct connection to the battery terminals of a wind turbine generator. The conductors of the charge controller are also "planted" directly on the contacts of the battery.
In fact, both of these parts of the circuit are in no way interconnected. The voltage from the wind generator is supplied to the battery constantly. When the voltage at the battery terminals reaches 14.2 W, the solid-state relay connects the load to reset. So the battery is protected by the device from overcharging.
Here, not only an incandescent lamp can act as a ballast load. It is quite possible to connect any other device rated for current up to 60 A. For example, an electric tubular heater.
What is more important in this scheme - the action of a solid-state relay is characterized by a smoothly increasing amplitude. In fact, there is the effect of a professionally manufactured PWM controller.
A complicated version of the controller circuit
If the previous version of the circuit design of the battery charge controller only resembles a PWM device (pulse width modulation), here this principle is implemented specifically.
This controller circuit for a wind turbine with a three-phase generator differs in some difficulties, since it involves the use of microcircuits - in particular, operational amplifiers using field-effect transistors as part of the TL084 assembly.
However, on a circuit board, everything does not look as complicated as on a paper sheet.

Do it yourself circuitry for assembling a controller using TL084 microassembly. The principle of operation is also built using a relay to switch modes, but it is possible to adjust the cut-off points (+)
As in previous solutions, a relay is used as a switching element for a ballast load. The relay is designed to work with a 12-volt battery, but if desired, you can choose a model for 24 watts.
The ballast is made in the form of a powerful resistance (winding on ceramics nichrome). To adjust the operating voltage range (11.5-18 W), the circuit uses variable resistors included in the TL084 microelectronic assembly control circuit.
Such a windmill battery charge controller works as follows. The three-phase current received from the wind generator is rectified by power diodes.
At the output of the diode bridge, a constant voltage is generated, which is fed to the input of the circuit through the relay contacts, an additional diode, the battery and then to the in-circuit stabilizer (78L08) and to the input of the TL084 assembly.
The moment the trigger is switched to one of the states is determined by the values of the variable resistors (Low V and High V) of the lower and upper voltage thresholds.
As long as the battery voltage does not exceed 14.2 volts (satisfying the setting value of R High V), a charge is performed. As soon as the values change in the direction of increase, the operational amplifier TL084 sends a signal to the base of the transistor, which is controlled by the relay.

A self-made product according to the scheme with micro-assembly TL084. Everything is extremely simple, even instead of a high-quality printed circuit board, a board for hinged installation is selected. Homemade designs always delight with such moments.
The relay is triggered, the power circuit of the circuit breaks and closes to the ballast resistor. Ballast reset takes place until the battery is discharged close to the setting of the Low V variable resistor.
Once this value is reached, the second operational amplifier TL084 circuit switches to the reverse state. This is how the controller works.
Chinese electronic alternative
Making a do-it-yourself wind generator controller is a prestigious affair. But given the speed of development of electronic technologies, often the meaning of self-assembly loses its relevance. In addition, most of the proposed schemes are already obsolete.
It turns out cheaper to buy a finished product made professionally, with high quality installation, on modern electronic components. For example, you can purchase a suitable device at a reasonable cost on Aliexpress.
The range of offers on the Chinese site is impressive. Controllers for wind generators for various power levels are sold at a price of 1000 rubles. If you build on this amount, in terms of assembling the device with your own hands, the game is clearly not worth the candle.
So, for example, among the offers of the Chinese portal there is a model for a 600-watt wind turbine. A device worth 1070 rubles. suitable for working with 12/24 volt batteries, in operating current mode up to 30 A.

A very decent, designed for a 600-watt wind generator, a charge controller in Chinese design. Such a device can be ordered from China and received via mail in about a month and a half
A high-quality all-weather controller case measuring 100x90 mm is equipped with a powerful cooling radiator. The design of the housing complies with IP67. The range of external temperatures is from - 35 to + 75ºС. A light indication of the state modes of the wind generator is displayed on the body.
The question is, what is the reason to spend time and effort on assembling a simple design with your own hands, if there is a real opportunity to buy something similar and technically serious?
Well, if this model is not enough, the Chinese have very cool options. So, among the new arrivals, a 2 kW model for an operating voltage of 96 volts was noted.

Chinese product from the new arrival list. Provides battery control while working in conjunction with a 2 kW wind generator. Accepts up to 96 volts input
True, the cost of this controller is already five times more expensive than the previous development. But then again, if you measure the cost of producing something similar with your own hands, the purchase looks like a rational decision.
The only thing that confuses Chinese products is that they tend to suddenly stop working in the most inappropriate cases. Therefore, the purchased device often has to be brought to mind - naturally, with your own hands. But this is much easier and simpler than making a charge generator for a wind generator with your own hands from scratch.
For lovers of homemade products on our website there is a series of articles devoted to the manufacture of wind generators:
- DIY wind generator from a car generator: windmill assembly technology and error analysis
- How to build do-it-yourself blades for a wind generator: examples of self-made blades for a wind turbine
- Do-it-yourself wind generator from a washing machine: assembly instructions for a windmill
- How to calculate a wind generator: formulas + practical example of calculation
The desire to make home-made equipment for home use is sometimes stronger than a simpler solution - buying an inexpensive device. What came of this, see the video:
Assessing the prospects of manufacturing electronics on their own regardless of its purpose, one has to come across the thought that the age of "homemade" is ending.
The market is oversaturated with ready-made electronic devices and modular components for almost every household product. Amateur electronics enthusiasts now have only one thing left to do - to assemble home designers.
Is there anything to supplement, or have questions about the assembly and use of controllers for a wind generator? You can leave comments, ask questions and add photos of your homemade products - the contact form is in the lower block.