The drainage system is designed to protect underground structures from groundwater. It is needed in areas with complex hydrogeological conditions, among which we have the majority of land plots.
Timely drainage around the house will extend the life of the foundation, save you from perpetual repairs. It’s cheaper to prevent the destruction of the building’s foundation than to restore it endlessly, do you agree?
How to organize drainage around a private house, you will learn from the article. A detailed description of the varieties and principles of operation of the drainage system will help determine the optimal version of the device. Using the proposed information, you will be able to build a workable network for the removal of groundwater yourself.
The owners of the plots who wish to independently construct closed drainage will find a detailed description of the technology and a step-by-step summary of the work sequence. The text part is supplemented by photo confirmation and video instruction.
Reasons for organizing a drainage system
A special system of drainage pipes or channels is arranged so that as much moisture as possible gets inside and moves to a safe distance from the house or other buildings. The problem of the effect of moisture on the foundation is usually characteristic of clay soils: sandy loam, loam, clay.
In an area dominated by clay rocks in the section, water is slowly absorbed or does not leave at all. Due to stagnation of water, the foundation of the house is destroyed. The existing waterproofing protection of the foundation may not be sufficient; weakly glued seams, unprocessed mastic areas may appear on it.

A drainage system around the perimeter of the house is arranged to protect the foundation and basements from groundwater. Drainage is usually complemented by rainfall intended for collection and discharge of precipitation
As a result, mold, fungus occurs on the concrete monolith, corrosion occurs on the reinforcement, which in the future often causes the destruction of the foundation.
On sandy, well-permeable soils, moisture goes away faster, so this kind of problem is less common. But still, the owner of the house should not relax and rely on "maybe" in this matter.
Excessive moisture in the structure can be caused not only by the characteristics of the soil, but also by other features of the site. For example, a high level of groundwater, which prevents the seepage of moisture from the overlying layers down.

The drainage system being built around the house is laid to the depth of the base of the foundation so that groundwater is completely diverted from the underground structure
If the bottom of the wall after rain for a long time is covered with wet spots, this indicates that you need to think about the need for drainage facilities. Wet walls in the basement, the presence of mold or fungus indicates that the drainage problem on the site should have been dealt with yesterday.

The lack of a drainage system where it was needed will cause not only the destruction of the foundation, but also the walls. Building structures will gradually become wet and weaken due to natural capillary suction
Even a very good waterproofing of the foundation eventually deteriorates. This is another reason to take care of good drainage near the house. The smaller the impact of groundwater on the structural parts of the structure, the less often will require large-scale work to restore the waterproofing layer applied to the foundation.
If the collection and disposal of ground and flood water were not provided for at the construction stage, after construction it is possible to take care of the drainage around the house and its construction with your own hands.
Image Gallery
Photo from
The main sign signaling the need for a drainage system is flood and melt water that are not absorbed into the soil for a long time, as well as puddles after rain. This means that the underlying soil layers have low water permeability.
The need for the construction of drainage may appear at the stage of development of the pit. This fact confirms the need for engineering and geological surveys before construction - they will reveal a similar situation, so measures to drain the site and drain water will be laid at the design stage
Foundation protection measures include not only drainage facilities, but also the installation of a waterproofing barrier
Drainage is especially important if you plan to equip the basement and insulation of underground structures. Wet insulation loses 70% of its insulating properties
No need to confuse the storm sewer and the drainage system. Although they are often laid in one trench, they solve different problems
Sewage collected by storm sewers and groundwater collected by drainage are discharged through different pipes, but can be discharged into a common collector well, which redirects water to discharge objects
Stacked pipes and storm sewer canals with point storm water inlets can be stacked in a common trench. The linear version of the stormwater is constructed separately from the drainage; it can only coincide in systems of the arych type
A variety of options are used for the disposal and disposal of water collected by drainage. If the area of the site allows, and the underlying layers have better filtration properties than the overlying ones, then it is better to build an absorption well for water disposal
Water stagnation during the flood period
Water in the pit of a house under construction
Groundwater protection device
Water drainage for insulation protection
Storm and drain pipe laying in one trench
Swivel well of underground utilities
Storm collector of a spot storm
Absorption well for drainage system
Typical types of drainage
There are several basic drainage systems with which you can collect and remove unnecessary moisture from the house and from the site. With proper design and installation, each of them demonstrates a fairly high efficiency, but the cost of time, effort and money depends on the complexity of the design.
There are three options for organizing a drainage system:
- open
- filling;
- closed.
Open drainage systems They are ditches with a depth of about 50-70 cm and a width of the order of half a meter. Such ditches were dug around the house is not a problem, but the landscape will suffer noticeably from this. And jumping all the time through the recesses surrounding the house is not very convenient.

Open drainage is arranged according to the type of irrigation canals - a system of canals with permeable walls through which groundwater penetrates the canal and is diverted to the discharge site
Outdoor drainage is usually covered with neat decorative grilles. They protect the structure from large debris and blockages caused by it. And such grooves with gratings look more aesthetically pleasing.
Filling drainage systems They are approximately the same ditches, only they are not covered with protective grilles, but they are covered with moisture-permeable material, for example, coarse gravel, broken brick or gravel. It is not so difficult to arrange drainage of this type, and the costs will be quite moderate.

Fill drainage systems are very simple to implement, they consist of a ditch filled with large filtering material, for example, gravel
Before starting work, you need to mark and carefully cut the sod at the site of excavation. The ditches do not go to the top, so that there is little space left.
The turf stored for these purposes is laid on top of the backfill to minimize damage to the site landscape. It is recommended to lay a geotextile layer at the bottom of the ditch to extend the life of the structure.
This version of the drainage system has some disadvantages: it is harder to clean than an open system. Of course, garbage getting into such a drainage is unlikely, but the problem of silting the contents of the ditches remains.
If the efficiency of moisture removal decreases markedly, you may have to remove the sod again, completely replace the filler, and then return the system to its previous state.
Indoor drainage the most difficult to install, but at the same time it is reliable and has a long service life. A layer of gravel or similar materials is laid in the drainage ditches, pipes with a perforated surface are installed on top.
Plastic structures are usually used, they are cheaper, weigh less and perforation is easier on their surface than on metal counterparts.

Often the drainage system is supplemented by a storm system, which is necessary to divert heavy rainfall. Usually it consists of a set of pipes and trays through which water moves to the collector well
Closed drainage systems are most conveniently mounted along the curb of the paths surrounding the house. Here the whole system will be securely hidden and will not affect the appearance of the site at all. There is also such a thing as wall drainage.
He is satisfied with the process of building a house in those cases when it is planned to build a basement or basement. Drainage pipes are laid directly in the pit under the foundation near the walls, and then all this is covered with filter material and soil.

For the construction of a closed drainage system, you will need a perforated plastic pipe, rubble and a layer of geotextile. You can use a conventional sewer pipe, on which holes are made
Another important element of the system is storm drainage. These are open trays that are designed to collect and transport water collected from the roof and blind areas of the house during rain. Storm drainage can also be open and closed; it is usually installed under drainpipes connected to gutters and funnels.
Features of the organization of drainage of the garden plot are described in detail in this article.
Groundwater drainage system design
Of course, the drainage system consists not only of pipes and trays. To monitor the condition of the system, inspection wells are needed, and a drainage well should be arranged in which this excess moisture will be discharged. For this reason, the ditches into which the pipes are laid give a slight slope towards this well.

Before starting work on the installation of a drainage system, a project should be drawn up to calculate the amount of necessary materials and avoid errors (+)
It makes sense to consider the installation procedure for a closed drainage system, since it is the most difficult to implement. An open and backfill option can be arranged based on the same principles.
Closed system pipes are laid around the perimeter of the building at a distance of 0.7-1.0 m from it. By analogy, grooves are formed for the open and backfill drainage scheme.
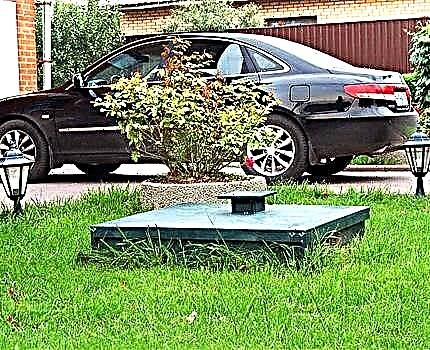
At each corner where the trench is turning, inspection wells should be installed. In advance, it is necessary to determine the location of the collector well into which the discharge of water will be discharged.
If it is supposed to collect water outside the site, then arrange a drainage well. Another pipe is laid from it, which usually goes to the roadside ditch. You can also tap to a local reservoir, if one is in the immediate vicinity of the house.

Pipes in the manhole are laid so that there is a gap between them. This allows you to easily inspect and maintain the system.
The depth of the trench under the closed drainage depends on the size of the foundation. Pipes should be laid 50 cm deeper than foundation slabs. At the same time, the bias of communications should be 0.7-1%.
Do not lay pipes with a large slope, as this can cause blockages. A small slope is also not recommended, as this will adversely affect the process of moisture removal.

A trench for a closed drainage system is made half a meter deeper than the foundation slabs, while observing a slope of 1%
The width of the trench should be 20 cm greater than the diameter of the drainage pipe: 10 cm of clearance on each side. The location of the drainage system should be schematically reflected on paper, indicating all its elements. This will allow you to calculate the length of communications, as well as the number of additional elements necessary for proper installation of the system.
Features of the closed version
Having figured out how to properly make the drainage around the house, and drawing up the project, you should prepare for further work. You should stock up with materials, as well as the necessary tools.
In the course of work, you may need:
- twine for marking and marking the position of communications;
- construction level and plumb to control pipe slope;
- bayonet and shovel;
- tool for tamping soil;
- a bucket and / or wheelbarrow for transporting waste land;
- tape measure to take measurements;
- hacksaw for metal, etc.
You will also need a certain amount of drainage pipes. These are special constructions with perforation, usually they are made of plastic. Instead, you can use plastic pipes for external sewage, having previously made holes on their surface with an ordinary drill.
Additionally, it is necessary to prepare: geotextiles, sand, gravel or other similar material, manholes by the number of turns, etc.

During the installation of the drainage system around the house, geotextiles are used - a non-woven filter material, as well as crushed stone of large fractions
Geotextiles are necessary in order to protect the filler surrounding the drainage pipe from the penetration of fine clay particles and siltation. Saving on this material is not worth it. It should be enough to completely cover the walls and the bottom of the dug trench, as well as cover the bombarded pipe with a solid overlap.
First, it is recommended to mark on the ground, and then proceed with earthwork. Usually they begin to dig from the highest point in the system, gradually deepening the trench.
When calculating the slope of the drainage pipe, you can focus on a standard of 1%. If the length of the trench is 20 m, then the height difference between its start and end point should be 20 cm. The necessary measurements are carried out using an ordinary tape measure.
After the trench is ready, its bottom must be carefully tamped. Then a 10 cm layer of sand is poured into the bottom, which is also carefully compacted. After that, it is recommended to cover the entire trench with a layer of geotextile so that both the bottom and walls of the structure are covered, and the edges of the material come to the surface and lie freely on the ground.

The device of a closed drainage system uses drainage pipes with perforation, geotextiles and bulk materials: sand, gravel, crushed stone (+)
Now, on the bottom, hidden by geotextile, you need to pour a layer of gravel of about 20 cm. Any filter material: crushed stone, expanded clay, fragments of brick, etc. will be acceptable. The main thing is that its fraction be larger than the size of the holes in the drainage pipes, otherwise blockages cannot be avoided.
After laying, gravel must be leveled and it is imperative to check the slope of the communications, it must correspond to the previously performed calculations and measurements.
If everything is in order, drainage pipes are placed on the gravel, connect them to the inspection and drainage wells. Then the system is covered with another layer of gravel (crushed stone, expanded clay, etc.). The height of this layer should also be 20 cm. The edges of the geotextile, which remained free, are wrapped over the backfill layer.

In places of rotation of the drainage pipe, inspection wells are installed, which are necessary to monitor the state of the system. Top them with lids
The overlap of the layers of nonwoven material should be about 30 cm. Sometimes it is recommended to fix the position of the geotextile with twine or plastic clips.
Now you can fill the rest of the trench with sand (you need a layer of 10 cm) and soil. The sand needs to be compacted again, especially in the space on the sides of the drain pipe. Stacked earlier sod is laid on top or tracks are mounted.
You can also come up with your own version of decorating the place for laying drainage pipes. Access should remain to the covers of the inspection wells, as well as to the point of discharge of the removed moisture.
Viewing wells are vertical plastic containers, covered with lids. They are used to periodically check the status of the system.
A drainage well is a wider capacity; it can be round or square in configuration. Most often, an old plastic barrel is used to equip it.
Image Gallery
Photo from
Unloading the collected water into the gutter
Absorbing well construction
Perforated filter well
Manifold well for further transportation
You can also use concrete rings of suitable diameter or make walls of monolithic concrete. In the latter case, reinforcement of the structure must be performed. The top of the drainage well should be closed with a strong cover.
Stages of building drainage around the house
The construction of a drainage system, designed at the stage of drainage and laid during the construction of the house, includes a number of standard stages following one after another:
Image Gallery
Photo from
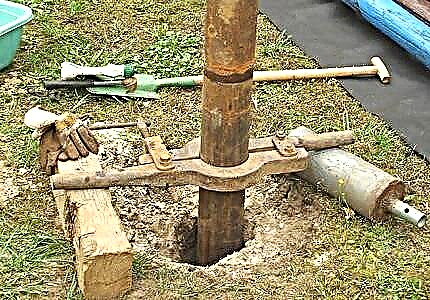
According to the points marked with a laser level, we perform the initial marking of the site. Manually designate angles and reference points of future structures
We continue to breakdown the future construction site using a laser level. Mark the outline of the trench for foundation and drainage
We develop an excavator trench for underground utilities: for laying drainage pipes, stormwater and ordinary sewage
We fill the bottom of the trench with quarry sand that does not contain lumps of loam and sandy loam. We ram the bottom with a slope of 2-3 cm per meter, directed towards the collector receiving the drains
We put geotextiles on the tamped bottom of the trench. We bring the edges of the cloth to the walls of the trench by about 15-20 cm
We assemble a storm sewer and a drainage pipe mounted from perforated corrugated pipes wrapped in geotextiles. We lay systems in one trench. If a sewer network is laid nearby, it is also more reasonable to lay its pipe in one trench
At the bends of the route and every 25 m we install viewing and rotary sewer wells. For stormwater and drainage, they can match, we put the wells of ordinary sewers separately
We fill the trench with the assembled systems connected to the inspection and rotary wells, as well as to the collector well, first with gravel, then with quarry sand
Stage 1: Breakdown of the foundation and drainage site
Stage 2: Performing Precise Instrumental Marking
Stage 3: Development of a trench for underground utilities
Stage 4: Sanding the trench and tamping
Stage 5: Laying geotextiles at the bottom of the trench
Stage 6: drainage and communications assembly
Step 7: Connect the systems to the inspection wells
Stage 8: Filling the trench with systems
Purpose of the blind area and its device
Protecting the walls and foundation from unnecessary moisture will also help supplementing the drainage of the blind area around the house. This is the name of the layer of waterproof material, which is laid along the walls with a slope outward. Precipitation, falling on the blind area, immediately flows away from the house, so the contact of the walls and the foundation with moisture will be minimal.

The blind area around the house is carried out using waterproof materials that are laid at an obtuse angle to the surface of the outer wall
To perform the blind area, you can use the following materials:
- clay;
- a rock;
- paving slabs;
- asphalt;
- concrete;
- PVP membranes.
Installation of blind areas made of clay and stone, as well as from paving slabs, can turn out to be rather laborious, however, such a finish looks just fine. Asphalting and concreting will cost much cheaper, but it looks very modest, even utilitarian.
PVP membranes are mounted in the thickness of the soil, any convenient coating can be arranged on top: turf, tile, lawn, etc.
The procedure for doing the drainage at home with your own hands is clearly presented in this video:
Interesting drainage tips can be found here:
The option of performing blind areas around the house:
Obviously, to protect the house from moisture, a number of measures must be taken, and the drainage system should be effectively combined with the blind area, stormwater, etc. In the future, all efforts will pay off, because the foundation of the house, its walls and the basement will not need repair for a long time.
Do you have personal experience with arranging drainage around your home? Want to share best practices or ask questions on a topic? Please leave comments - the discussion form is located below.