A key condition for creating a communication system is to establish a structured work of the cable system, which cannot be implemented without computer outlets.
What types of connectors for automation of communication the modern market offers and what features of installation does a computer outlet have, we will consider in the article.
Computer outlet and its types
To connect computer equipment and any other peripheral equipment, a computer outlet of the RJ-45 standard is used. It complies with uniform communication norms and standards designed to automate most tasks.
The device includes a plastic case, inside of which from one to four connectors are placed.

A computer outlet is a device whose main function is to transfer a connection from a computer’s network card to cable networks
To organize a home network, devices with one or two connectors are most often used. In devices with two connectors, the first is for connecting to the data cable going to the computer, and the second is for switching with the punch panel.
The cable transmitting information, referred to as “twisted pair”, is simply inserted into the intended module with a contact. Through another twisted pair, the information goes to the network.

RJ11 standard telephone modules are equipped with two-pair connectors with four contacts, and telecommunication devices of the RJ45 type are equipped with 8 contacts
Externally, the computer RJ45 connector is similar to the telephone analogue of RJ11. But the main difference between the devices is the number of contacts. In telephone models, 4 contacts, and in information - 8 pieces. For this reason, if the computer RJ45 socket can be used as a telephone, then computer equipment cannot be connected to the RJ11 socket.
The installation sequence for most types of computer sockets is typical. You need to perform a series of almost similar steps:
Image Gallery
Photo from
Step 1: Preparing the device for installation
Step 2: Connecting a Computer Outlet
Step 3: Connect the wires with spring terminals
Step 4: Installing the terminal container lid
Step 5: Fixing the wall outlet casing to the wall
Step 6: Attaching the Socket Mechanism to the Case
Step 7: Installing the front panel of the device
Step 8: Health Check
Outlet Categories
The distance to which the signal will be transmitted with minimal distortion, as well as the data rate itself, depends on what category the computer outlet belongs to.
When equipping office and household networks, these types of sockets are often used:
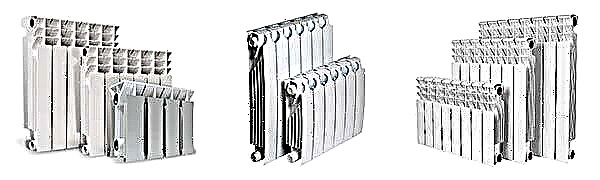
- RJ-45 Cat.5 - Designed to organize 100BASE-TX networks with a frequency band of 125 MHz at a data transfer rate of 100 Mbps.
- RJ-45 Cat.5e - a more "advanced" option that allows you to transfer data for two pairs within 100 Mbit / s., For four pairs - 1000 Mbit / s.
- RJ-45 Cat.6 - Designed for arranging Gigabit Ethernet and Fast Ethernet networks. The bandwidth of the device is up to 1000 Mbps.
There are several basic parameters by which computer sockets are divided. One of them is the installation method.
External and internal connection points
Depending on the installation method, the devices are divided into two types:
- External - used when the device must be placed on the surface of the wall. On the back side of the device for external installation there is a connector equipped with knife contacts. If a wire is pressed into them, the insulation breaks through the conductors, making installation much easier.
- Domestic - suggest installation inside the mounting box with the device buried in the cavity of a concrete, brick or plasterboard wall. The connector of such devices is usually removable. It is removed, and after installation in a wall socket, deepened into the wall, it is clamped with a plastic screw.
Cases of devices for outdoor installation are made of durable technopolymers of a non-combustible type. Due to this, their outer surface is resistant to UV rays.

The use of internal outlets provides a presentable appearance of the wiring, but complicates the process of servicing equipment in the event of a breakdown
Complete and collapsible models
Depending on the type of configuration, the devices are divided into two types:
- With built-in modules. In the equipped models, the contact board and connectors are originally built in. They provide an invariable type of shielding.
- With interchangeable modules. In devices of this type, the modules are separated from the front panel. This solution allows you to make any combination: “UTP” and “FTP” of different categories - 3, 5, 6, 7.
Complete devices with integrated modules are affordable and easy to install. But in the event of a breakdown, the entire structure has to be replaced.

Devices with a plug-in module benefit from the fact that they are easy to maintain, and if necessary, the flexible module cannot be replaced in accordance with the needs of the system
The main criterion that should be followed when choosing a device is the availability of additional ports. For example, if it is necessary to service several units of equipment, it is worth choosing double sockets of the RJ-45 type. In a two-module model, a computer can be connected to one RJ-45 port, and a telephone can be connected to the second RJ-11.
There are also models in which both modules are designed to connect computer equipment. But ports differ in category and type of shielding. The use of such devices allows you to save costs by combining modules for your needs and equipment category.
Give preference to products from trusted manufacturers. This is a guarantee that the products are manufactured in accordance with generally accepted norms and standards. High-quality devices will easily be combined with any type of computer equipment and calmly withstand the voltage of Russian networks.
Hardware Requirements
Without a set of accessories, it is impossible to connect a computer outlet.
Separately, you will have to purchase:
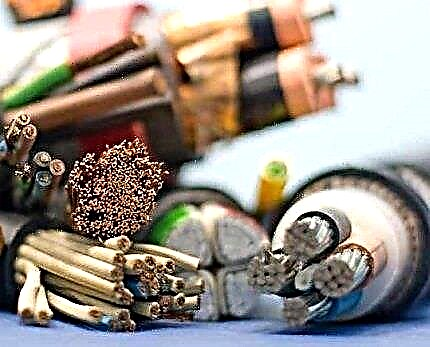
- Cable (lan) corresponding category.
- Connector (jack) - A device in the form of an eight-pin plug for connecting a cable to a computer port.
- Patch panel - Provides the ability to quickly switch between active network equipment and operating points. The number of ports of the device depends on the number of connected equipment and can vary from 10 to 50.
To connect the RJ45 cat.5e socket, a four-pair shielded “twisted pair” cable is required, equipped with a common foil screen of the type KVPEf-5e 4x2x0.52. In the case of connecting the RJ45 cat.6 model, a four-pair twisted pair cable, but already of the KVP-6 4x2x0.57 type, is also required.

The generally accepted option for cutting in Russia is the standard EIA-5688; its marking is displayed in Latin letter “B”
An eight-core cable for the Internet includes four twisted pairs. The second wire in each twisted pair has a white insulation and is marked with a white stripe.
Information cables are divided into several categories, starting with the third. The higher the category, the higher the transmission standard.
To transfer data at 1 Gb / s, two-pair cables are used, and within 10 Gb / s - four-pair analogues. The difference between them in price is not big. And therefore, planning to use a larger number of conductors in the future, it is better to immediately purchase a four-pair network.

Category “3” and “5” cables are used for data transfer at a speed of 100 Mbit / s, and categories starting from “5е” and higher - at 1000 Mbit / s
When installing connection points, preference should be given to shielded cable types that are most protected from interference. Shielded cables are suitable for a wide range of tasks: telephony, smart TV, Ethernet.
If during the installation of the equipment the cable is not long enough or one of its sections is damaged, you can use the adapter “socket-socket”. When connecting a connector for cable extension, to avoid errors, you just need to focus on the color indicators printed inside the box.

The RJ45 “socket-to-socket” adapter allows you to quickly connect twisted pairs equipped with an appropriate standard connector without compromising signal loss
When choosing a pat panel, be guided by the category of the outlet. On sale there are devices of the category "5", "5e" and "6".
The end of the data cable is equipped with an 8P8C connector, referred to in the professional jargon as “jack”. It has a transparent body through which multi-colored wires are visible.
This item is often mistakenly called RJ45. But in fact, RJ45 is an accepted standard, and the exact name of the connector is 8P8C. Today, the standard for connecting twisted pair wires TIA / EIA-568-B, generally accepted since 2001, is used for connecting to equipment.
When connecting an Internet cable, two schemes are allowed: T568A and T568V. But in our country, the wires are located mainly using the “B” scheme.

The twisted pair cable connection standard TIA / EIA-568-B implies a sequence of wires in this order: (1-2) –white-orange with orange, (3-4) –white-green with blue, (5-6) white-blue with green, (7-8) - white-brown with brown
When connecting 10BASE-T and 100BASE-T networks, they use the TIA / EIA-568-A standard. Fear that when you connect a twisted pair, you can accidentally mix something up, do not. Modern router models are designed for both options. Therefore, they are able to automatically flip the signal.
Rules for the location of connection points
If you are not a fan of “garlands” of bound wires, you should seriously approach the issue of placing sockets. After all, every manipulation of installing and moving connection points implies at least redecorating the room.
Connecting a desktop computer requires at least five outlets. Therefore, the best solution would be to install a unit that includes several points: for a modem, monitor, system unit ...

When choosing a place for installing information sockets, it’s worth focusing primarily on not the “Euro standard” - 15 cm from the floor level, but the number of connected equipment
In fairness, it is worth noting that it is also allowed to connect computer equipment without using outlets. But this installation method is too complicated to perform. And besides, it is completely unjustified, especially in those situations when you have to work with large networks.
Moreover, no one can guarantee with certainty that in the near future one more smart TV, computer or any other device will not be “powered” from this connection point.
If you need to increase the twisted pair, a detailed briefing on connecting the segments of the Internet cable is described here.
Technology for installing computer outlets
There is nothing complicated in connecting a computer outlet with your own hands. It is only necessary to adhere to the given sequence in their actions.
Selection of the necessary tools
To carry out the work, it is necessary to prepare:
- hammer drill equipped with a crown of the corresponding diameter;
- crossing knife for stripping;
- screwdriwer set;
- tester.
In addition to the main set of tools, it is worth taking care of acquiring crimping pliers in advance. This tool costs about $ 10. And therefore, for a one-time job, it makes sense to rent it.
Cable management and installation of the socket
The first step is to bring the cable to the installation point. It can be laid open or closed. The first method involves laying the cable in plastic boxes equipped with removable covers, or placing it behind the walls of the baseboard.

By placing the cable overhead and "seating" it on a DIN rail, you can not only simplify the installation procedure, but also facilitate the maintenance process
The so-called modular waybill method, which involves fixing the cable to the wall using special dowels of the “quick installation” option, was also widely used.
To implement the second method, gates are made, into the cavity of which the cable is laid. To do this, using a punch equipped with a special crown, make a round niche in the wall. The diameter of the crown must match the size of the box.

The mounting box is connected to the connection points in a hole in the wall and fixed with screws and dowels
The end of the failed cable is cut off, leaving a margin for the possibility of subsequent multiple connections. The extra end must be carefully laid in a circle inside the box, avoiding fractures of the conductor.
Connect device contacts
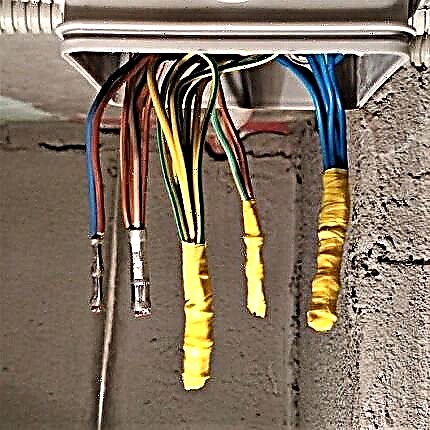
To connect the power outlet, the outer protective insulation is removed using the blades of the cross-cutting knife, freeing the end 5-6 cm long. This procedure should be carried out carefully so as to avoid damage to the insulation of the conductors.

Under the stripped insulation, four multi-colored pairs of conductors twisted in two should appear; some cables also have a thin shield wire
Each pair is neatly leveled. There is no need to clean them, since the platform device itself provides reliable contact. The front panel is removed from the socket housing by unscrewing the screw fixing it.
Some models of sockets are equipped with special latches that work like clamps. In such models, in order to remove part of the accessories and gain access to the internal mechanism, you need to carefully rotate the latch-handle located on the rear face.

Each core is put into the slots of the outlet, focusing on the connection diagram with the colors under each number, applied to the upper face of the device, or attached in the instructions for it
All cores are alternately in accordance with the color inserted into the latch. The end of each core is fixed with a clamping bolt. To drown each core as deep as possible, use the back of the clerical knife.
Color coding of the marking of all terminals greatly simplifies the process of docking a computer outlet and crimping a twisted pair. Do not worry if the vein does not go all the way. When the latch returns to its original position, the recesses located on the sides will push the cores to the end.
When all the conductors are led into the seats, the sticking pieces are carefully cut.
All about how the pinout of twisted pair conductors is performed, you can read here.

The "core" with the connected cores is installed in the same place, turning the latch-handle in the opposite direction
Using an open installation method, the device case is fixed on the wall, pointing the computer connector down and the cable inlet up. With the closed installation method, the socket is buried in the socket prepared for it, fixing by means of spacers.
At the final stage, using the tester, they check the connection. If there is no tester at hand, you can simply plug the end of the cable going to the computer into the “core” connected but not yet installed in the socket.
After making sure that the connection is correct, all that remains is to screw on the front panel.
Connector Termination in Connector
To connect the connector, remove the insulation from the end of the cable. Each pair is untwisted and leveled, directing in different directions. If a shielding thin wire is provided, it is also bent to the side for a while.
When laying out pairs in a certain sequence, they are guided by the “B” scheme described above.

The wires tightly laid in one row are aligned and cut, leaving a length of 10-12 mm so that the insulation of the twisted pair starts above the latch
Twisted pairs with cut ends of the wires lead into the cavity of the connector. The connector should be latched down. Each conductor is laid on a separate track, trying to push it all the way.
The connector with the wires laid in it is inserted into the pliers. To close the connector, you need to smoothly bring the handle of the tick together.

The protrusions in the mounting nests of the pincers, when pressed, move the conductors to the micro-knives, and they will already cut through the protective sheath and provide reliable contact
Ideally, if the connector body "fits" into the socket normally, no effort is required. If it is necessary to re-cable, you only need to cut the end again and perform the same actions, but with a different “jack”.
The technology for installing a double outlet is similar. The only thing is that you will have to put two cables from the router, since they do not use parallel connection for network equipment.
Clip # 1. An example of installing a Viko RJ45 socket:
Clip # 2. How to crimp wires correctly:
Knowing how to connect an Internet outlet, you can always upgrade your home network on your own. The main thing is to adhere to the scheme and not get confused in the color designation of the wires.
Do you want to share your personal experience in the device sockets for connecting a computer or ask a question about interesting points? Found flaws in the article? Please write comments in the block below.